Setting Up ArgoCD with Multi-Cluster Support on Amazon EKS: A Step-by-Step Guide

👋 Welcome to my Hashnode profile! I'm a passionate technologist with expertise in AWS, DevOps, Kubernetes, Terraform, Datree, and various cloud technologies. Here's a glimpse into what I bring to the table: 🌟 Cloud Aficionado: I thrive in the world of cloud technologies, particularly AWS. From architecting scalable infrastructure to optimizing cost efficiency, I love diving deep into the AWS ecosystem and crafting robust solutions. 🚀 DevOps Champion: As a DevOps enthusiast, I embrace the culture of collaboration and continuous improvement. I specialize in streamlining development workflows, implementing CI/CD pipelines, and automating infrastructure deployment using modern tools like Kubernetes. ⛵ Kubernetes Navigator: Navigating the seas of containerization is my forte. With a solid grasp on Kubernetes, I orchestrate containerized applications, manage deployments, and ensure seamless scalability while maximizing resource utilization. 🏗️ Terraform Magician: Building infrastructure as code is where I excel. With Terraform, I conjure up infrastructure blueprints, define infrastructure-as-code, and provision resources across multiple cloud platforms, ensuring consistent and reproducible deployments. 🌳 Datree Guardian: In my quest for secure and compliant code, I leverage Datree to enforce best practices and prevent misconfigurations. I'm passionate about maintaining code quality, security, and reliability in every project I undertake. 🌐 Cloud Explorer: The ever-evolving cloud landscape fascinates me, and I'm constantly exploring new technologies and trends. From serverless architectures to big data analytics, I'm eager to stay ahead of the curve and help you harness the full potential of the cloud. Whether you need assistance in designing scalable architectures, optimizing your infrastructure, or enhancing your DevOps practices, I'm here to collaborate and share my knowledge. Let's embark on a journey together, where we leverage cutting-edge technologies to build robust and efficient solutions in the cloud! 🚀💻
Introduction:
In today's dynamic cloud-native environments, orchestrating and managing Kubernetes clusters across multiple clouds and regions has become increasingly common. Amazon Elastic Kubernetes Service (Amazon EKS) offers a scalable and reliable platform for deploying containerized applications. To streamline deployment and management processes, ArgoCD, a popular GitOps continuous delivery tool, provides robust capabilities for managing Kubernetes applications declaratively.
This guide presents a comprehensive step-by-step approach to implementing ArgoCD with multi-cluster support on Amazon EKS. By following these instructions, you'll be equipped to efficiently manage application deployments across multiple EKS clusters, ensuring consistency and reliability across your infrastructure. Let's delve into the intricacies of setting up ArgoCD in a multi-cluster environment, empowering you to optimize your Kubernetes workflows with ease and effectiveness.
Centralized Hub-Spoke Model for Multi-Cluster Deployment
Explore the advantages and potential drawbacks of the centralized Hub-spoke model, offering insight into its utility for organizations with a centralized DevOps team. Engaging anecdotes or case studies can bring out the practical implications of managing multiple clusters with this model.

Prerequisites:
AWS Account: You'll need access to an Amazon Web Services (AWS) account to provision Amazon EKS clusters and associated resources.
AWS configure
Local Setup:
kubectl: Ensure that you have
kubectlinstalled on your local machine to interact with Kubernetes clusters.
eksctl: Install
eksctl, a command-line utility for creating and managing EKS clusters, to simplify cluster provisioning.Helm: Install
Helm, the Kubernetes package manager, which will be used to install ArgoCD on your EKS clusters.
Basic Kubernetes Knowledge: Familiarize yourself with Kubernetes concepts such as clusters, namespaces, deployments, and services. Understanding these fundamentals will facilitate smoother navigation and configuration within your Kubernetes environments.
Install ArgoCD CLI on Windows
To install the ArgoCD CLI on Windows, firstly download the argocd-windows-amd64.exe executable for Windows from the latest release page:

Open a user’s home folder by typing %USERPROFILE% in the address bar of a “File Explorer”:

In the user’s home create a bin folder, move the argocd-windows-amd64.exe there and rename it to the argocd.exe:

Start the environment variables editor – press the ⊞ Win keybutton to open the “Start” menu, type in envi and click on “Edit environment variables for your account”.
The environment variables editor can also be launched with the following command from the CMD or PowerShell:
C:\> rundll32 sysdm.cpl,EditEnvironmentVariables
Add the bin folder to a Path environment variable:

Procedure:
Setting Up ArgoCD with Multi-Cluster Support on Amazon EKS
1. Cluster Creation on Amazon EKS
Utilize
eksctlto create two distinct Amazon EKS clusters: one hub cluster and one spoke cluster.The hub cluster acts as a central control plane, while the spoke cluster serves as a managed cluster.
This initial step lays the foundation for establishing ArgoCD with multi-cluster support on Amazon EKS, enabling efficient management and deployment of applications across the designated clusters.

- Create node groups for hub and spoke clusters:


Updating Kubeconfig for Hub Cluster:
Retrieve kubeconfig for the Hub Cluster: Use the AWS CLI or the EKS console to retrieve the kubeconfig for the hub cluster.
aws eks --region <region> update-kubeconfig --name <hub-cluster-name>Verify Configuration: Ensure that the kubeconfig file (
~/.kube/configby default) has been updated with the correct context for the hub cluster.Updating Kubeconfig for Spoke Cluster:
Retrieve kubeconfig for the Spoke Cluster: Similarly, use the AWS CLI or the EKS console to retrieve the kubeconfig for the spoke cluster.
aws eks --region <region> update-kubeconfig --name <spoke-cluster-name>Verify Configuration: Verify that the kubeconfig file (
~/.kube/configby default) now includes the context for the spoke cluster.
Check Available Contexts:
You can list all available contexts by running the following command:
kubectl config get-contextsThis command will output a list of available contexts along with information such as the current context and the cluster, user, and namespace associated with each context.
Set Context to Hub Cluster:
Once you've identified the context associated with the hub cluster, you can set the current context to the hub cluster using the following command:
kubectl config use-context <hub-cluster-context-name>Replace
<hub-cluster-context-name>with the name of the context associated with your hub cluster.
Installing Argo CD:
 # Step 1: Create Namespace
 kubectl create namespace argocd
This command creates a new Kubernetes namespace named
argocd. Namespaces provide a way to organize and scope resources within a Kubernetes cluster. In this case, Argo CD services and application resources will be organized within theargocdnamespace for better management and isolation.Step 2: Apply Argo CD Manifests kubectl apply -n argocd -f https://raw.githubusercontent.com/argoproj/argo-cd/stable/manifests/install.yamlThis command applies the Argo CD manifests to the
argocdnamespace. These manifests define the various resources required to deploy Argo CD within the Kubernetes cluster. It includes the deployment of the Argo CD server, its components, RBAC (Role-Based Access Control) rules, and other necessary configurations.
By executing these commands, you are setting up Argo CD within your Kubernetes cluster. After the installation, you can access the Argo CD UI, manage applications, and perform GitOps operations to deploy and manage your Kubernetes resources declaratively.

Access The Argo CD API Server
By default, the Argo CD API server is not exposed with an external IP. To access the API server, choose one of the following techniques to expose the Argo CD API server:
Service Type Load Balancer
Change the argocd-server service type to
LoadBalancer:kubectl patch svc argocd-server -n argocd -p '{"spec": {"type": "LoadBalancer"}}'
In AWS Console You can see the argocd Loadbalancer was created. Now we can access ArgoCD UI using the DNS name of LoadBalancer.

Retrieve the Argo CD Admin Password:
To log in to the Argo CD UI, you need the initial admin password. Run the following command to get the password:
kubectl -n argocd get secret argocd-initial-admin-secret -o jsonpath="{.data.password}" | base64 -dCopy the password and use it to log in to the Argo CD UI.
ArgoCD Dashboard:

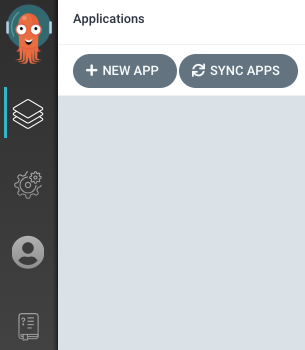
Creating Apps Via UI
Open a browser to the Argo CD external UI, and login by visiting the IP/hostname in a browser and use the credentials set in step 4.
After logging in, click the + New App button as shown below:
Give your app the name
guestbook, use the projectdefault, and leave the sync policy asManual: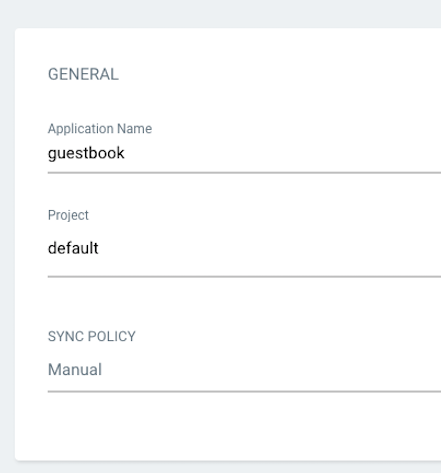
Connect the https://github.com/argoproj/argocd-example-apps.git repo to Argo CD by setting repository url to the github repo url, leave revision as
HEAD, and set the path toguestbook: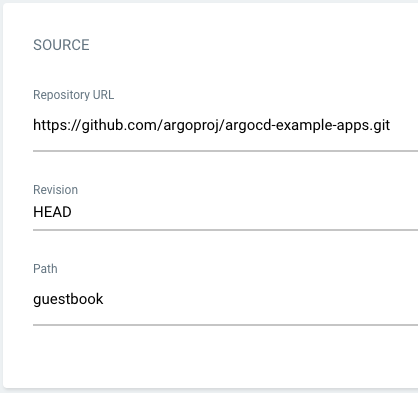
For Destination, set cluster URL to
https://kubernetes.default.svc(orin-clusterfor cluster name) and namespace todefault: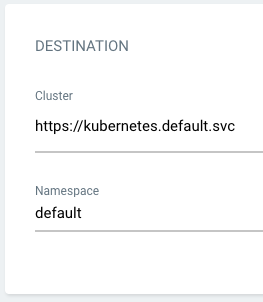
After filling out the information above, click Create at the top of the UI to create the
guestbookapplication:

In the below section, you can see only one cluster by default. So we need to add the spoke clusters here by doing the below steps:

ArgoCD Login:
To log in to ArgoCD, you typically use the ArgoCD CLI. Here's how you can log in:
argocd login <ARGOCD_SERVER_IP_OR_DOMAIN> [--username <USERNAME>] [--password <PASSWORD>] [--insecure]Replace
<ARGOCD_SERVER_IP_OR_DOMAIN>with the IP address or domain name of your ArgoCD server.--username(optional): Specify the username if your ArgoCD instance requires authentication.--password(optional): Specify the password if your ArgoCD instance requires authentication.--insecure(optional): Use this flag if your ArgoCD server is using self-signed SSL certificates.
If you have already set up port-forwarding to access the ArgoCD server locally, you can use localhost as the server address.
After executing the argocd login command, you should be logged in to your ArgoCD instance, and you can proceed to manage applications and perform other operations using the ArgoCD CLI.

Adding cluster in argoCD:
To add clusters to Argo CD, you need to define each cluster as a context within the Argo CD configuration. Here's how you can add clusters to Argo CD:
Use the
argocd cluster addcommand to add clusters to Argo CD:argocd cluster add <CLUSTER_NAME> --kubeconfig <KUBECONFIG_PATH>Replace
<CLUSTER_NAME>with a descriptive name for the cluster, and<KUBECONFIG_PATH>with the path to the kubeconfig file for the cluster.Optionally, you can provide additional flags to specify authentication credentials or other configuration options.
Verify Cluster Addition:
Once you have added the clusters, you should see them listed in the Argo CD UI or CLI. You can verify that Argo CD has successfully established connections to the clusters by checking the cluster status.
By adding clusters to Argo CD, you enable Argo CD to manage applications and deployments across multiple Kubernetes clusters, providing a centralized platform for GitOps workflows and continuous delivery.


Create Application for another cluster:
Access Argo CD UI:
Open your web browser and navigate to the Argo CD UI URL. Log in with your credentials.
Create Application:
Once logged in, you should see the Argo CD dashboard. To create a new application, click on the "New Application" button or navigate to the "Applications" tab and click on "Create Application".
Select GitHub Repository:
In the application creation wizard, you'll be prompted to provide details about your application. Choose the Git repository that contains your application manifests. You'll need to specify the repository URL, the revision (branch/tag/commit), and the path to the application manifests within the repository.
Define Application Settings:
Fill in the necessary details such as the application name, namespace, and any other relevant settings.
Select Target Cluster:
In the "Destination" section, select the target cluster where you want to deploy the application. Choose "New Cluster" if the cluster you want to deploy to is not yet configured in Argo CD.
Configure New Cluster:
If you select "New Cluster", you'll need to provide the details of the new cluster, including the server URL, authentication method, and any other required settings. Argo CD will use this information to establish a connection to the cluster.
Review and Create:
Review all the configuration settings you've provided for the application and the target cluster. Once you're satisfied, click on the "Create" or "Save" button to create the application.
Monitor Deployment:
Argo CD will automatically start the synchronization process, deploying the application to the target cluster. You can monitor the deployment progress and view any synchronization errors or warnings in the Argo CD UI.

By following these steps, you can create an application in the Argo CD UI and deploy it to a new cluster, streamlining the process of managing your Kubernetes applications across multiple clusters.

Conclusion:
In conclusion, setting up Argo CD with multi-cluster support on Amazon EKS empowers organizations to streamline their Kubernetes deployment and management workflows effectively. By leveraging Argo CD's GitOps principles, teams can achieve declarative, version-controlled application deployments across distributed clusters with ease and reliability.
With a structured approach to cluster creation, Argo CD installation, and configuration, organizations can establish a robust foundation for their multi-cluster Kubernetes environments. Through the integration of Argo CD with Amazon EKS, teams can orchestrate deployments, manage configurations, and enforce policies across clusters, promoting consistency and scalability across their infrastructure.

The ability to add and manage clusters through Argo CD's intuitive user interface or CLI enhances operational efficiency and simplifies cluster management tasks. Moreover, Argo CD's continuous delivery capabilities enable teams to automate the deployment lifecycle, facilitating rapid iteration and delivery of applications while ensuring stability and compliance.
In essence, the adoption of Argo CD with multi-cluster support on Amazon EKS empowers organizations to embrace modern DevOps practices, foster collaboration between development and operations teams, and accelerate the pace of innovation in their cloud-native environments. By embracing Argo CD's robust feature set and embracing the GitOps methodology, organizations can navigate the complexities of multi-cluster Kubernetes deployments with confidence and agility.


